Overwintering Canna Lilies: Update

Early last fall, I decided to take the plunge and learn how to overwinter Canna lily bulbs. I’d never done it before but am crazy about Cannas and hate tossing them in the compost pile once the frosts hit.
It turns out, it’s not all that hard. Here’s a video I filmed on the initial process:
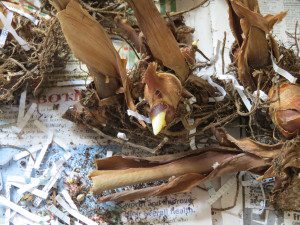
I stored the Canna lily bulbs in our basement in bags filled with shredded paper. Each month during the winter, I checked on them to make sure they weren’t shriveling up or rotting. I lost a couple of bulbs but ended up with a total of 16 viable bulbs. That’s 80%! Not bad for a beginner.
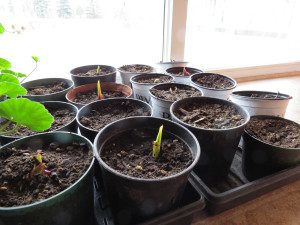
Early last month, I decided to pull the bulbs out of the bags and pot them up. I used an organic potting soil. It’s important to avoid using garden soil when they’re going to sit in pots for a couple more months since it will easily compress and might even contain pathogens. I want to protect the bulbs by using a sterile potting soil.
I placed the pots in front of our south-facing sliding glass door and have been keeping the potting soil lightly moist. To my delight, I’m starting to see green sprouts emerging from the soil! Hooray!
Since I live in zone 4b/5a, I know we typically have frosts up to about mid-May. That’s 2 months from now. So my plan is to continue keeping an eye on the potting soil moisture and move the pots out to our unheated greenhouse sometime next month. I’ll probably rest a layer of floating row cover over the pots to provide them with a little extra frost protection.
So that’s where things stand. Mid-May will be the time that I plant the Canna lilies outdoors, although you’d better believe I’ll be watching the weather forecasts like a hawk! No point in letting them get frosted after all this tender loving care, right?
I’ll do another update next month so stay tuned…


