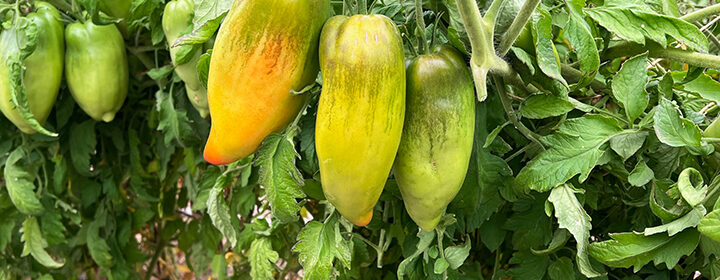
How to Grow Tomatoes

Who wants to grow tomatoes? Probably everybody, right? This detailed guide contains exactly what you need to know in order to be a champion tomato grower! I’ve got plenty of variety suggestions for you, too.
Latin Name: Solanum lycopersicum
Plant Family: Nightshade (Solanaceae)
Warm-season crop
Did You Know?
The tomato is the most popular crop grown in vegetable gardens. Yet it might surprise you to learn it wasn’t always so warmly embraced. It originated in South America. When it was introduced to Europe in the 16th century, people did not want anything to do with it. As a member of the nightshade family, the tomato had been misidentified as deadly nightshade and a mandrake, both of which are quite poisonous. In the late 1700s, many wealthy Europeans who ate tomatoes ended up dying from lead poisoning. How is this possible? It turns out they ate off of pewter plates which contain lead, and the acidity of the tomatoes leached out the lead into the food. Unfortunately, the connection between the tomato and poison was made. By the late 1800s, however, tomatoes were widely used in Italian cooking — especially for pizza — and its popularity soared.
Today, the tomato is the queen of the garden. That’s not surprising when you consider how difficult it is to find a fully ripe, flavorful tomato in grocery stores. There are so many cultivars of tomatoes to choose from. I think it’s best to focus first on the type of tomato you’re after. Are you looking for cherry or grape tomatoes for snacking? Slicing types for salads sandwiches? Paste tomatoes for making sauce, salsa and ketchup? How about amazing heirlooms with a rich history? Or whopper beefsteaks for bragging rights?
Another consideration is whether you should choose determinate or indeterminate cultivars. What’s the difference? Determinates are shorter in height (3 to 4 feet) and produce the bulk of their crop at the same time. This is a great type if you plan to can a lot of tomatoes and also for growing in containers. Indeterminates are taller (usually 6 feet but up to 12) and produce fruit throughout the season. That means they give you a much longer harvest.
Grafted tomatoes are one more option available in many nurseries. Growers graft specific cultivars onto a rootstock selected for its cold hardiness or resistance to certain diseases. The resulting plants tend to be more vigorous and productive than their non-grafted counterparts. Some seed catalogs offer grafted tomato plants.
Once you’ve determined your needs, make sure you know how many frost-free days are in your growing season. That way, you’ll choose ideally-suited cultivars. You can find the “days to maturity” information on seed packets or plant tags. The number of days refers to the time it takes a plant to produce mature fruit after being planted in the garden.
The most important lesson I’ve learned over the years is to avoid starting my tomato plants from seed too early. This results in weak, leggy, root-bound plants which is a terrible way to start off. I start my plants 6 weeks before transplanting them into the garden. This means they are at a perfect size and not stressed from being in their pots too long. If you’ll be starting them on a sunny windowsill rather than under a grow light, they might develop a little more slowly.
By following my tried-and-true tips below, you will have the best success growing tomatoes.
Plant Seeds or Seedlings? Start seeds indoors about 6 weeks before the last anticipated frost date. Or you can purchase seedlings at a nursery or plant sale.
When: Transplant seedlings into the garden after all danger of frost has passed and they have been through a weeklong hardening-off process. This means gradually acclimating the plants to the intensity of the sun over about 7 days.
Days to Germination: 7 to 14 days
Depth to Sow: 1/4 inch
Spacing: Plant seedlings 2 to 3 feet apart in the garden.
Days to Maturity: 55 to 95 (varies widely depending on type)
Cultural Information:
Remember that all members of the Nightshade family should be planted in different locations each year over a 3-year period. This will decrease the chances of insect and disease issues for them.
Plants started from seed will likely need to be up-potted into larger containers once they have two pairs of true (mature) leaves. This is because it will probably be too early to transplant them out into the garden. Use organic potting soil and feed the seedlings with a weak solution of nitrogen fertilizer. I use fish emulsion at half-strength with the full amount of water recommended on the label. For example, if the label calls for 1 tablespoon of fertilizer to 1 gallon of water, add 1/2 tablespoon of fertilizer to 1 gallon of water.
(Handy hint: Let’s say you accidentally drop the plant at some point, or it gets knocked over and the top of the plant breaks off. While that might sound like a catastrophe, all is not lost. Just place the top of the plant into a glass of water and roots will start growing from the base! I know, that sounds crazy, right? It will develop a fair amount of roots and you can carry on growing it.)
Prepare your planting bed by working compost and bonemeal into the top 3 inches of soil. If you have a drip irrigation or soaker hose set-up, place it on top of the soil.
When it’s warm enough to transplant your seedlings into the garden, use the following planting method. Tomatoes benefit by being planted deeply. That’s because they will form additional roots along the stem. It makes them stronger and allows them to draw more moisture and nutrients from the soil.
Remove the lowest pair of leaves, provided there are at least two remaining pairs of leaves. Place the plants deeply into their holes, with the soil just below the lowest remaining leaves. Firmly press down the soil so there are no air pockets around the roots. Water each plant well and feed them again with a diluted fish emulsion fertilizer at half-strength.
Cover the surface of the bed with a thick mulch, such as grass clippings from an untreated lawn or shredded leaves. This will prevent soil from splashing up into the foliage during rainstorms or while watering.
Most tomato plants require some type of support. If you let your plants sprawl along the ground, the fruits will take longer to ripen. In addition, there’s the potential for the fruit to rot or for soil pathogens to spread to the leaves. Make sure you choose a sturdy support. Don’t purchase small, flimsy tomato cages as they’ll fall over in short order. That could break the plant’s main stem or cause root damage. Instead, use large tomato cages that are 3-4 feet in height. Another option is growing them up a sheet of concrete-reinforcing wire, a cattle panel, or a metal gate. Support these with heavy-duty stakes.
Early in the season, cover the plants with floating row cover to provide them some extra warmth. You might need to get creative to cover their support system as well, but it’s definitely worth it. Throughout the growing season, check if the plants need to be tied to their supports or guided back inside a tomato cage.
Plants should not be require pruning early in the growing season. There is no need to remove suckers, those smaller branches that emerge from the point where a branch emerges from the main stem. By removing suckers, you are greatly reducing your plant’s production potential. And if you love fresh tomatoes as much as I do, that’s the last thing you’ll want to do!
Got green tomatoes? In late summer, begin a three-step pruning regimen to ensure the plants will ripen most of the tomatoes. About 6 weeks before the average first frost date, shorten the branches to just above any fruits that should ripen in time. Two weeks later, prune back the new growth again. Two weeks before the first potential frost, you want to prune back the plants severely. This involves cutting off branches just above any green fruits that are close to full size. Also, turn off the water to the bed to shock the plants into ripening those last tomatoes. If your plants just aren’t getting the message, take a shovel and cut down into the soil in a half-circle about 10 inches from the main stem. This will cut through the roots and further stress the plant. While all of this might sound rather harsh, it really works!
Finally, if a frost is imminent and you still have green tomatoes on your plants, do this. Pick those that are full size, or nearly there, and plant them in a cool, dark location. Put them on a single layer of newspaper and don’t let them touch each other. Over the next few weeks, they’ll slowly ripen and provide you with fresh tomatoes well after the garden season is over.
Susan’s Picks:
Cherry, grape or pear — ‘Indigo Blue’, ‘Sungold’, ‘Supersweet 100’, ‘Yellow Pear’, ‘Pandorino’, ‘Valentine’
Dwarf — ‘Orange Hat’
Short-season — ‘Early Girl’, ‘Glacier’, ‘Legend’, ‘Oregon Spring’, ‘Stupice’
Slicing — ‘Chef’s Choice Orange’, ‘Jetstar’
Paste — ‘Amish Paste’, ‘Blue Beech’, ‘Italian Pompeii’, ‘Roma’, ‘San Marzano’, ‘Supremo’
Beefsteak — ‘Atlas’, Big Zac’
Heirloom — ‘Black Krim’, ‘Brandywine’, ‘Cherokee Purple’, ‘Costoluto Genovese’, ‘Green Zebra’
Potential Insect Problems: tomato or tobacco hornworm, tomato fruitworm
When to Harvest:
This might sound silly but red cultivars are ripe when they are red. The best way to determine if a tomato is ripe (esp. if it isn’t a red cultivar) is to eat one. If it’s flavorful and has a bit of softness to the flesh, it’s ripe.
How to Cook & Preserve:
Fresh tomatoes are a joy to eat throughout the summer months. They can also be used to make juice, add to soups (including cold gazpacho) and stews, and for fresh pasta sauce. You can also make bruschetta to serve on toasted bread.
There are many ways to preserve your harvest. Make sauce, ketchup or salsa and can them according to safe canning methods. You can roast tomatoes, onions, peppers and garlic in the oven, puree them together, and freeze the sauce, too. Note that many tomato cultivars have low acidity. Play it safe by using a pressure-canner to preserve them. Another option is to dehydrate cherry or grape tomato halves and store them in a jar for later use in sauces.
My Videos About Growing Tomatoes:
- Let’s Grow Tomatoes From Seed to Harvest!
- How to Plant Tomatoes
- Tomato Harvest
- Tomato Insect Pests & Disorders
- Blossom End Rot
- Ripen Your Tomatoes #1
- Ripen Your Prune Tomatoes #2
- Ripen Your Prune Tomatoes #3
- Organic Insect Control: Flea Beetles, Hornworms, Slugs & Snails
Back to Vegetable Grow Guide Chart
Copyright: Susan Mulvihill, Susan’s in the Garden, SusansintheGarden.com.

