How to Grow Potatoes

We grow potatoes every year because they’re such a wonderful addition to our vegetable garden. As you’ll see below, there are a few important steps to follow but they’re well worth it.
Latin Name: Solanum tuberosum
Plant Family: Nightshade (Solanaceae)
Cool-season crop
Did You Know?
In addition to potassium, potatoes supply us with complex carbohydrates, vitamin C and trace minerals. Types include thicker-skinned russets; smooth-skinned with red, yellow, blue or purple skins; and the smaller fingerlings. There are also early, mid- and late-season varieties. With so many to choose from, think about how you’ll want to use them before making your selections.
Plant Seeds or Seedlings? Plant certified, disease-free seed potatoes directly in the garden.
When: About 4 weeks before the last anticipated spring frost.
Days to Germination: It takes 3 to 4 weeks for seed potatoes to emerge from the soil.
Depth to Sow: 5 to 6 inches
Spacing: Place seed potatoes 10 to 12 inches apart.
Cultural Information:
Remember that all members of the Nightshade family should be planted in different locations each year for 3 years. This is known as crop rotation and helps reduce or prevent disease and insect problems.
Prepare planting bed by working compost and some bonemeal into the top 6 inches of the soil. Refer to the package directions for the amount to use. There are two methods you can use to grow potatoes. Plant small, whole seed potatoes or cut a large seed potato into chunks that contain at least two “eyes.” The eyes are the depressions where the sprouts will emerge. Let the chunks air-day for several hours before planting to avoid rot. I prefer to plant small, whole seed potatoes since there’s less chance of them rotting.
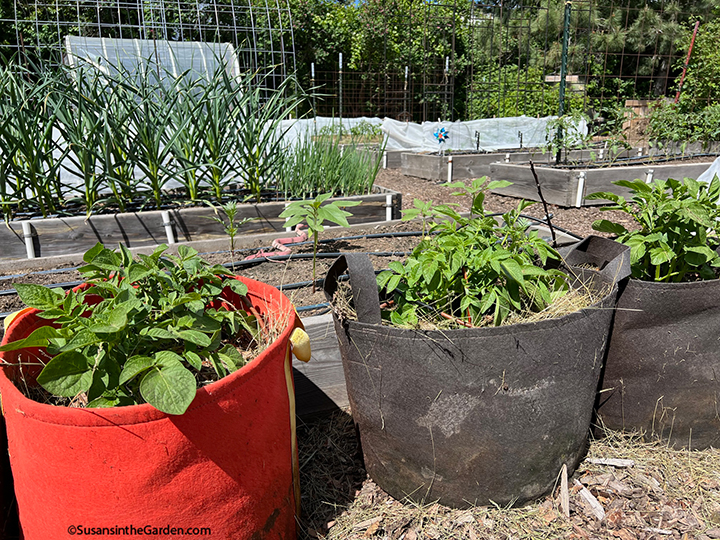
Two other planting options involve the use of a grow bag or the hilling technique. To plant potatoes in a grow bag, fold down the top 4 inches to create a cuff. Place about 4 inches of organic potting soil along with some bonemeal in the bottom. Put a few seed potatoes onto the surface and cover them with another 4 inches of potting soil. Water them in. Once the potato seedlings have grown several inches tall, add more soil and unfold the cuff. Let the plants grow again and add more soil. Continue this routine under the bag is completely full. Monitor the soil moisture so the bag doesn’t dry out.
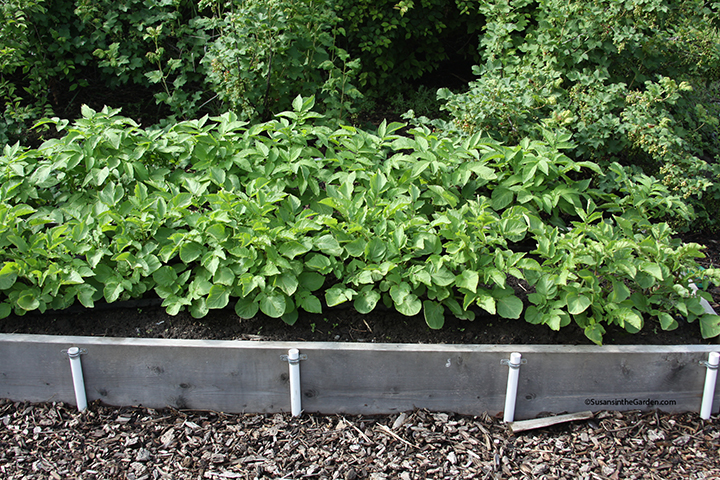
The hilling technique involves two slightly different methods. Add 2 inches of soil around the plants every time they grow about 6 inches, or a thick layer of straw at those intervals. Do this until you have added a total of 6 to 8 inches of soil or straw.
It’s important to protect any potatoes developing near the soil surface from the sun’s rays. Sunlight turns potatoes green and promotes the development of an alkaloid called solanine. It is harmful when consumed in large quantities. There’s a simple solution to prevent this from occurring, however. Apply a thick mulch to the entire surface of the bed and leave it in place the entire season.
Avoid stressing the plants by allowing the soil to get too dry as this can cause growth deformities of the tubers and affect their taste. Keep the soil moderately moist during the majority of the season, and check the soil regularly during prolonged hot, dry spells.
When potato plants start blooming, this indicates small tubers have developed in the soil. It’s perfectly fine to sneak a few but don’t get too carried away if you want to have plenty of mature potatoes for a fall harvest. Occasionally, those blossoms will develop into “fruits” that look like tiny potatoes. Do NOT eat them as they are highly poisonous! Instead, clip them off the plants and discard them. I also wanted to point out that sometimes the plants don’t bloom. This is perfectly fine.
Susan’s Picks: ‘Blue Belle’, ‘Cheshire’, ‘Kennebec’, ‘Red Norland’, ‘Viking Purple’, ‘Yukon Gem’, ‘Yukon Gold’. Fingerlings: ‘Ama Rosa’, ‘Austrian Crescent’, ‘Purple Peruvian’.
Potential Insect Problems: Colorado potato beetle, flea beetle, wireworm
When to Harvest:
In the fall, wait until the foliage has been completely frosted and turns brown before digging up your crop. I love to grow potatoes because harvesting them is like digging for buried treasure! Avoid damaging the potatoes as this affects how long they’ll last in storage.
How to Cook & Preserve:
While baked potatoes immediately come to mind as the most popular use for the tubers, there are many more uses. Add them to soups, stews, casseroles and stratas. To preserve your potato harvest, put the freshly-dug tubers in a shady area to allow most of the soil to fall off. Do not hose off the tubers. Here is our most successful method for long-term potato storage. Fill a plastic bin with lightly-moistened straw and place the tubers in layers inside it. Rest the lid on top but don’t snap it on as air circulation is important. Keep the bin in a cool, dark area such as a garage or chilly basement.
My Videos About Growing Potatoes:
- Plant Potatoes
- Plant Potatoes & Onions
- Plant Potatoes in Containers
- Harvest Potatoes, Carrots & Beets
Back to Vegetable Grow Guide Chart
Copyright: Susan Mulvihill, Susan’s in the Garden, SusansintheGarden.com.


