Video: Winter Sowing

Winter sowing is the topic of this week’s video. And it just happens to be my third video of the 2024 gardening season. Some of you may be familiar with this unusual method of starting seeds. But this just might be the first time many of you have heard of it, however.
Put simply, this is a method of starting seeds outdoors during the dead of winter. Yeah, I know, that sounds crazy! But I’ve done it for a few years now and it really works. Learn about the simple supplies you’ll need and which seeds make good candidates for this method. Then follow along as I give you step-by-step instructions for the best success.
I wrote a column about winter sowing a few years ago. Here’s a link to it: Give seeds a cold start. (Or you can read it underneath the video.)
I have covered the important steps and rationale behind this method in this video in a concise manner. I’ll hope you’ll enjoy it and give it a try. I guarantee you will be hooked!
Column:
by Susan Mulvihill / FOR THE SPOKESMAN-REVIEW
Who enjoys doing fun DIY projects? And what if those projects involved gardening in the dead of winter?
Today’s topic is winter sowing. I’ll bet you will want to get started as soon as you’ve finished reading this. If you haven’t heard of winter sowing before, it seems like it’s all the rage these days. I’ve heard about it on podcasts and watched videos. I have also read social media posts extolling the virtues of this unusual technique.
What is winter sowing?
The concept involves starting seeds outside in the dead of winter. That way, the seedlings will be in great shape by planting time in our gardens. Don’t worry, I haven’t forgotten we live in a cold climate. I remember that actually working in our gardens is still several weeks away.
This method involves sowing seeds outdoors in modified containers. The seeds will determine the right time to germinate. Thanks to good air circulation, there’s no risk of the seedlings being killed off by the fungal disease called damping-off. When it’s time to plant them in the garden, they will already have acclimated to the temperatures and sunlight. What’s more, this method does not require seed-starting space indoors under grow lights. You don’t need special equipment or have to fuss over the seedlings for weeks.
Supplies:
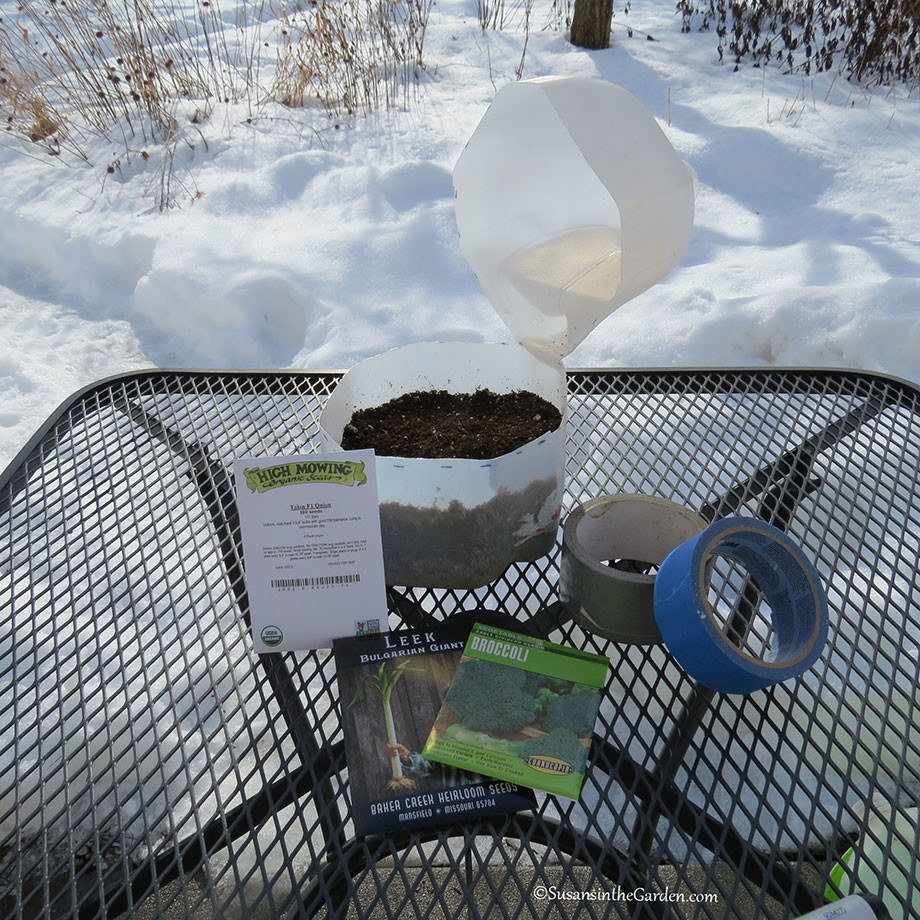
Start by collecting plastic half-gallon or one-gallon milk jugs. You can also use large pop bottles, or takeout containers with a deep bottom and lid. (think roast chicken from the grocery store). Other supplies are seeds, potting soil, duct tape or masking tape, and a waterproof marker.
Sterile potting soil works best. Avoid choosing mixes that contain fertilizer or water-retaining polymers. Do not use garden soil because it is too heavy for seed germination and might contain pathogens.
For tools, you’ll need a box-cutter, heavy-duty pair of scissors or a small knife for punching holes in the containers.
Winter sowing steps:
- Start with clean containers. Punch holes in the top of the container to allow your planting to get much-needed moisture in the form of rain or snow, and make drainage holes in the bottom. Remove the screw-on lid.
- If using a milk jug or pop bottle, cut it in half crosswise so the lower half is 4 to 5 inches deep; leave about 2 inches of the top portion connected to the bottom. The purpose of removing most of the upper portion is to make it easier to fill the lower half with potting soil and plant seeds.
- Pre-moisten the potting soil and place 3 to 4 inches of it into the lower half of the container; press down slightly to compact it.
- Sprinkle seeds on the top of the soil. It isn’t necessary to cover tiny seeds, but press larger seeds such as peas or sunflowers into the soil and/or cover them with additional soil according to the packet directions. Lightly water in the seeds.
- Replace the upper half of the container and use tape to attach it to the lower half.
- Use a waterproof marker to note which seeds you planted and the date.
- Place the container outside where it will get sunlight, rain and snow. Do not locate it under the eaves of your house or beneath other structures because the seeds and seedlings must get moisture and light. Make sure the containers won’t get blown over.
Here’s the easy part:
- The container won’t need any attention until temperatures begin to warm up. When the majority of the seeds have germinated, cut a little window in the upper portion of the container to increase air circulation. Be sure to keep an eye on the soil moisture from now on.
- Once the seedlings fill the container, it’s time to transplant them into the garden. Since they have been outside all this time, they won’t require hardening-off, which is the time-consuming process of slowly exposing them to sunlight and temperatures prior to planting.
Winter sowing is an easy, low-cost way to end up with a bunch of seedlings that you didn’t have to fuss over. And besides, we all love to learn new things, right? Find out more about winter sowing in this week’s “Everyone Can Grow a Garden” video at youtube.com/c/SusansintheGarden.
Susan Mulvihill is co-author, with Pat Munts, of “Northwest Gardener’s Handbook.” Contact her at Susan@susansinthegarden.com.
Seeds that are ideal for winter sowing
Annuals: Calendula, Canterbury bells, celosia, cosmos, marigold, morning glory, nicotiana, petunia, poppy, snapdragon, strawflower, sunflower.
Perennials: Baptisia, black-eyed Susan, butterfly weed, coneflower, blanketflower, liatris, obedient plant, sedum.
Vegetables: Allium family (leek, onion, shallot), arugula, broccoli, Brussels sprouts, cabbage, cauliflower, collard greens, endive, kale, kohlrabi, lettuce, pak choi, pea, radicchio, radish, spinach, Swiss chard.
Herbs: Chives, cilantro, dill, lavender, oregano, mint, parsley, sage, summer savory.

